viernes, 27 de agosto de 2010

Pelvis-Cintura / Pelvis-Waist


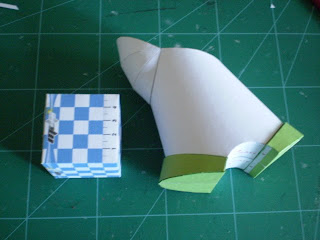
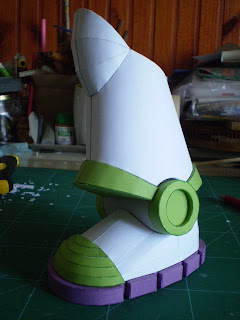
Aquí les dejo unas nuevas piezas de mi Buzz, la pieza con más dificultad es la cintura en forma de acordeón, les aconsejo que comiencen a pegar las medialunas F3, F4 desde el centro hacia los lados alternando con las F5 como indico en las instrucciones para que el armado no tenga deformaciones por el espesor del papel.
Las fotos del slide les pueden guiar en el orden del armado.

Here I leave them a few new pieces of my Buzz, the piece with more difficulty is the waist in the shape of accordion, I advise them to begin to beat the halfmoons F3, F4 from the center towards the sides alternating with the F5 since I indicate in the instructions in order that the build one should not take deformations as the thickness of the paper.
The photos of the slide can guide you in the order of the build one.


Pelvis-Cintura / Pelvis-Waist

viernes, 20 de agosto de 2010

Piernas 2da Parte / Legs 2nd Part


Esta es la segunda y ultima parte de las piernas, el archivo contiene los dos lados (der. & izq.) ubicando el detalle del “tornillo” hacia adentro. También están las piezas de las rodillas, en las hojas dice imprimir x 2, eso es porque el codo será la misma pieza por lo tanto necesitaremos 4 de estas esferas en total.
Les aconsejo que todavía no peguen estas piezas entre si (pierna1, rodilla y pierna2) hasta tener mas o menos completo el modelo así ustedes pueden buscarle una pose que les guste o donde se pueda mantener parado por si solo, yo en las fotos solo lo presento para ver como se vería pero por ahora no las pego.


This is the second one and last part of the legs, the file contains both sides (right. and left.) locating the detail of the "screw" inward. Also the pieces of the knees are, in the leaves he says to stamp x 2, it is because the elbow will be the same piece so we will need 4 of these spheres in total.
I advise them still not to stick these pieces between if (leg1, knee and leg2) up to having more or less the model complete you can look for one put that they like it or where there could be kept stopped by it only, I in the photos only present it to see since one would see but for the present I do not stick them.


Piernas segunda parte / Legs second part

viernes, 13 de agosto de 2010

Piernas 1ra. Parte / Legs 1rs. Part


Esta es la primer parte de dos que forman las piernas, es una pieza simple unida en dos mitades simétricas y también es simétrica para la pierna derecha como la izquierda por lo tanto hay que imprimir dos juegos para armar el par.
El hueco que quedara en la parte superior será para pegar a la rodilla.

This one is the first report of two that form the legs, is a simple piece joined in two symmetrical halves and also it is symmetrical for the right leg as the left side therefore it is necessary to stamp two copys to make the couple.
The hollow that was staying in the top part will be to stick to the knee.


Pierna 1ra. Parte / Leg 1rs. Part


jueves, 5 de agosto de 2010

Botas / Boots


Aquí les dejo las primeras piezas de mi papercraft Buzz Lightyear para que las descargar libremente.

Here I leave them the first pieces of my papercraft Buzz Lightyear in order that to free download.


Bota Derecha / Right Boot


Bota Izquierda / Left Boot


viernes, 30 de julio de 2010

Papercraft Buzz Lightyear


Este es mi primer modelo papercraft desde cero, usando para el diseño 3D el programa Sketchup 7 y luego desdoblo las partes o patrones en el programa Pepakura Designer 3 para luego de varios retoques finalmente imprimir y armar mi versión de Buzz Lightyear de aproximadamente 56cm de altura.
Uso como referencia de diseño una pequeña figura de plástico de donde saco todas las medidas más fotos y capturas de las películas.
Como es un modelo grande y por ahora esta en proceso, a medida que obtenga piezas completas la iré publicando para que las puedan descargarlas.
Con este modelo estoy participando en el primer concurso interforos latinos, puedes seguir el paso a paso aquí: Papercraft Buzz Lightyear desde cero


This is my first model papercraft from zero, using for the 3D design the program Sketchup 7 and then I unfold the parts or patterns in the program Pepakura Designer 3 for after several retouches finally to print and build my Buzz Lightyear's version of approximately 56cm height.
Use like reference of design a small figure of plastic wherefrom I extract all the measures and photos and captures of the movies too.
It is a big model in process so as it obtains complete pieces it will be publishing it in order that they could be download.
With this model I am taking part in the first contest Latin Interforums, you can continue step by step here: Papercraft Buzz Lightyear from zero